Barnes Village kitchen deep clean checklist

If your kitchen in Barnes Village has started to feel a bit dull around the edges - the extractor looks greasy, the oven door has that stubborn baked-on film, and the sink never quite sparkles no matter how much you wipe it - you are probably ready for a proper reset. This Barnes Village kitchen deep clean checklist is designed to help you tackle every key area in a calm, orderly way, without missing the places that usually get ignored. It is practical, local, and built for real homes, not showroom kitchens.
Whether you are preparing for guests, dealing with post-renovation dust, moving out, or just tired of fighting the same grime every week, a deep clean gives you a cleaner, fresher kitchen that is genuinely easier to maintain. And to be fair, once you know the right order, the whole thing feels much less overwhelming.
Why Barnes Village kitchen deep clean checklist Matters
A kitchen gets used hard. Steam, oil, crumbs, splash marks, kettle scale, fingerprints, and the odd forgotten spillage all build up gradually, so it is easy not to notice how much dirt has accumulated until one day the room feels sticky rather than clean. That is exactly why a checklist matters: it stops you cleaning reactively and helps you work methodically from top to bottom.
In Barnes Village, many homes have characterful kitchens with fitted units, mixed materials, older handles, wooden details, and hard-working appliances. Those features look lovely, but they also collect grime in seams, corners, and around fixtures. A structured approach helps you protect those surfaces instead of scrubbing randomly and risking damage.
It also matters because a deep clean is not just about appearance. A well-cleaned kitchen is easier to keep hygienic, less likely to hold odours, and much simpler to maintain week to week. If you have ever noticed a faint greasy smell that never seems to disappear, it is often hiding in places like the extractor hood, bin housing, splashback grout, or the rubber seals around appliances.
Practical takeaway: a deep clean is most effective when you treat the kitchen as a system - surfaces, appliances, cupboards, floors, and little hidden corners - not as one big wipe-down.
If you are comparing the benefits of doing it yourself versus booking help, the level of build-up usually decides it. Light maintenance can be manageable at home, but heavier cleaning, especially around ovens and high-use appliances, may be better handled by experienced deep cleaning specialists or broader one-off cleaning support when you need a proper reset.
How Barnes Village kitchen deep clean checklist Works
The checklist works by separating the kitchen into zones and working in a sensible sequence. That sequence matters more than people think. If you start the wrong way round, you end up cleaning the same surfaces twice, moving dirt back onto freshly wiped areas, or missing something because you got distracted by a stubborn pan mark. Happens all the time.
A good kitchen deep clean usually follows this flow:
- Clear clutter and remove loose items.
- Work from the highest points downwards.
- Clean appliances before floors.
- Tackle greasy areas with the right method, not more force.
- Finish with detail work like handles, switches, seals, and skirting.
Think of it like this: you are not just making things look tidy for ten minutes. You are reducing the layer of grime that makes future cleaning harder. That is the real value of a deep clean. A kettle splash now, a sticky cupboard edge later - it all compounds.
If a kitchen has severe oven residue or burnt-on carbon, it is sensible to separate that task from the rest of the room. The oven usually needs more focused work than a general clean, which is why many people combine kitchen deep cleaning with dedicated oven cleaning when they want a noticeably better finish.
Key Benefits and Practical Advantages
The obvious benefit is a cleaner kitchen. But the real advantages go a bit further than that, and honestly, that is where the checklist earns its keep.
- Better hygiene: food residue, grease, and dust are removed from places you do not always see.
- Less odour: old splashes, bin residue, and greasy extractor surfaces stop holding smells.
- Longer-lasting finishes: regular deep cleaning helps preserve cupboard doors, handles, and worktops.
- Improved cooking space: a clean kitchen is calmer to use and more pleasant to be in.
- Easier upkeep: once the heavy build-up is gone, weekly cleaning takes far less effort.
- Better impression: useful if you are hosting, letting a property, or preparing for a sale.
There is also a psychological benefit. A clean kitchen often makes the whole home feel more settled. You will notice it first thing in the morning when the counter is clear and the sink does not greet you with yesterday's leftovers. Small thing, big difference.
For homes where floors, rugs, or upholstered breakfast seating have also absorbed cooking smells or crumbs, it can make sense to pair the kitchen clean with related services such as hard floor cleaning, rug cleaning, or upholstery cleaning for a more complete refresh.
Who This Is For and When It Makes Sense
This checklist is for anyone who wants a proper kitchen reset, but it is especially useful in a few common situations:
- Busy households: when weekly wipe-downs are no longer enough.
- Tenants and landlords: when a property needs to be presented cleanly for handover or inspection.
- Homeowners after work has finished: because dust and residue from projects can settle everywhere, especially in a kitchen after decorating or refitting.
- Pre-event preparation: if you are hosting family, friends, or a special dinner and want the room to feel polished.
- People with older kitchens: where grease and wear gather in joints, trims, and around appliances.
It is also a useful guide if you are deciding whether to book help. If your kitchen only needs a controlled top-to-bottom clean, a domestic approach may be enough. If the room is overwhelmed by grime, or if you are dealing with a full-house reset, a professional domestic cleaning visit or a broader house cleaning plan may be the smarter move.
Truth be told, kitchens tell on us. If the sink, hob, and extractor are all looking tired at once, the room is usually overdue for a methodical deep clean rather than another quick wipe.
Step-by-Step Guidance
Here is a practical way to work through a Barnes Village kitchen deep clean without feeling scattered. You do not need fancy equipment, but you do need a sequence and a little patience.
1. Clear the room first
Take off anything that is sitting on the counters: utensil pots, small appliances, chopping boards, bread bins, cleaning sprays, tea towels, and random papers. The more you remove first, the easier it is to see what actually needs cleaning. If you leave items in place, you end up cleaning around them, which is just a messier version of pretending.
2. Dust and remove loose debris
Start high and work down. Wipe cabinet tops, shelves, light fittings, extractor edges, and any exposed ledges where dust settles. Then vacuum crumbs from skirting, corners, behind bins, and under movable items. This step stops debris from turning into muddy streaks once moisture is introduced.
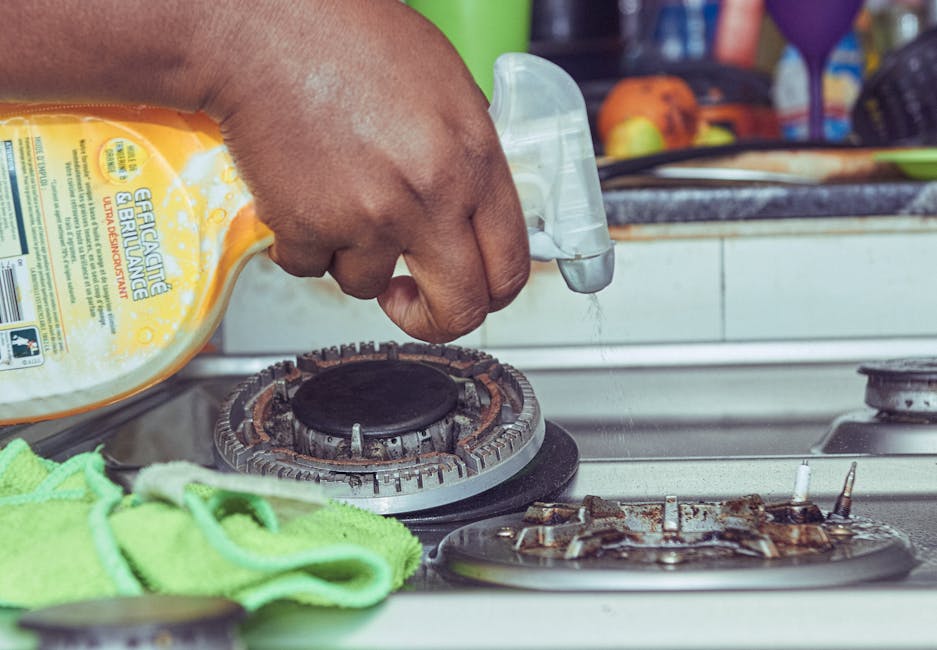
3. Tackle the extractor, hob, and splashback
Grease gathers fastest here. Degrease the hob surface carefully, lift removable grates or burners where safe, and wipe the splashback thoroughly. If the extractor filters are greasy, soak and clean them according to the manufacturer's guidance. This is one of the biggest visual wins in any kitchen. You can often feel the difference just by standing there - less tacky, less stale.
4. Clean the oven and nearby appliances
The oven, microwave, toaster, kettle base, and fridge handles often get neglected. Wipe exterior surfaces first, then move to interiors where suitable. Ovens usually need more specialised work than the rest of the kitchen because of baked-on residue and carbonised grease. For heavily used ovens, a focused oven cleaner service can save a lot of time and elbow grease.
5. Clean cupboards inside and out
Empty cupboards one section at a time if they need a real reset. Check for crumbs, sticky patches, old spills, and worn shelf liners. Wipe the outside panels, handles, and the edges around hinges. Do not forget the top edges of wall cupboards - they are classic dust traps and nobody enjoys finding a grey stripe up there after months of ignoring it.
6. Work on the sink, taps, and draining area
The sink is a small space, but it can look awful if limescale and soap residue are left to build up. Clean around the taps, plug holes, drainer grooves, and any sealant lines. If you have stainless steel, always dry it after wiping to avoid water marks. If you have a ceramic sink, check for tea staining or dull patches and treat them gently rather than scrubbing hard.
7. Refresh worktops and high-touch points
Wipe all worktops according to the material instructions. Pay close attention to seams, corners, and places where hands naturally land: fridge handles, cupboard pulls, light switches, bin lids, and appliance controls. These are small things, but they shape the overall feeling of cleanliness. A spotless kitchen with grubby handles does not quite convince anyone, let's face it.
8. Clean the fridge and freezer fronts
Use this moment to clean door seals, handles, and exterior panels. If you are emptying the fridge, dispose of expired items and wipe shelves as you go. Do not overdo strong cleaning products inside food storage areas; plain, safe methods are usually better than anything overly scented or harsh.
9. Finish with the floor
Leave the floor until the end so dust, crumbs, and drips from earlier steps can be removed in one pass. Sweep or vacuum carefully first, then mop or wash the floor based on the surface type. For hardwood, vinyl, tile, or stone, follow the appropriate care method. If your kitchen floor is part of a larger mixed-surface home, a professional cleaning company may be helpful for dealing with the different finishes properly.
Expert Tips for Better Results
Once you know the basics, the quality of the result comes down to details. These are the sorts of things that make a kitchen look genuinely clean rather than just freshly wiped.
- Work in sections. A kitchen is easier to handle in chunks than as one giant task.
- Let products sit briefly. Degreasers and descalers often work better if given a little dwell time. Not forever, just enough.
- Use microfibre cloths. They pick up grease and dust effectively without leaving a lot of lint behind.
- Dry shiny surfaces last. Handles, taps, glass, and chrome look much better when buffed dry.
- Open cupboards and drawers while you clean. It sounds obvious, but plenty of people forget the insides of doors and the upper lips of drawers.
- Keep a separate cloth for food areas. That small habit helps avoid cross-contamination between bins, floors, and food prep spaces.
Here is a simple expert habit: clean the least dirty surfaces first, and the dirtiest last. It sounds backwards until you try it. Then it suddenly makes sense. Your cloths stay fresher, and the room stays cleaner as you move through it.
If your kitchen has a lot of fabric elements nearby - bar stools, breakfast bench cushions, loose rugs - then attention to the surrounding soft furnishings matters too. Cooking residue travels further than people think, especially in compact rooms.
Common Mistakes to Avoid
Most disappointing deep cleans are not caused by a lack of effort. They are usually caused by a few avoidable mistakes.
- Starting with the floor: you will just end up re-cleaning it.
- Using harsh products everywhere: some surfaces, especially sealed wood and delicate finishes, need gentler care.
- Skipping high-touch areas: switches, handles, and taps show dirt quickly.
- Forgetting the edges: grease and crumbs love corners, trim lines, and the backs of appliances.
- Cleaning appliances too fast: built-up residue needs patience, not panic scrubbing.
- Not drying properly: water spots and streaks can make a kitchen look half-clean.
One of the easiest traps is over-cleaning one area because it is visible, while missing the less glamorous bits. The cupboard interior, the bin lid, the extractor fan grille - that is where the real story is. Not very glamorous, admittedly, but true.
If your kitchen has been affected by renovation dust or post-refurb residue, a dedicated after builders cleaning service can be far more appropriate than a standard tidy-up. Fine dust gets everywhere and behaves rather differently from normal kitchen mess.
Tools, Resources and Recommendations
You do not need a trolley full of products. A sensible kit usually beats an overcomplicated one. Keep it simple and safe.
| Tool or product | Best use | Practical note |
|---|---|---|
| Microfibre cloths | General wiping, buffing, dust removal | Use several so you can switch between greasy and clean areas |
| Soft sponge or non-scratch pad | Worktops, sinks, stubborn marks | Avoid abrasive pads on delicate finishes |
| Degreaser | Hob, splashback, extractor, cabinet fronts | Test a hidden spot first where possible |
| Descaler | Sink, taps, kettle base, limescale spots | Use carefully on materials that dislike acids |
| Vacuum cleaner with crevice tool | Corners, skirting, under appliances | Very useful before wet cleaning begins |
| Bucket and warm water | Floor cleaning and rinse stages | Change water often so you are not spreading grime around |
For some homes, the best resource is not another product but a sensible plan. If you are short on time, combine kitchen deep cleaning with broader domestic cleaning support or a regular visit from trusted cleaners so the maintenance load stays manageable.
And if you want help getting a clearer sense of scope and planning, it is also worth looking at pricing and quotes so you can compare what suits your home and schedule without guesswork.
Law, Compliance, Standards, or Best Practice
For household kitchen cleaning, there is usually no special legal process you need to follow just to deep clean the room. That said, best practice still matters, especially if you are using stronger products, working around electrical appliances, or cleaning on behalf of someone else.
In the UK, the sensible approach is to follow manufacturer instructions for appliances and surfaces, read product labels carefully, and avoid mixing chemicals. That last point sounds basic, but it is easy to get wrong in a hurry. Never combine cleaning chemicals unless the label explicitly says it is safe. If in doubt, stop and use plain water and a gentler method.
If you hire a company, it is reasonable to expect clear communication about safety, insurance, and how work will be carried out. A trustworthy provider should have transparent policies and practical care standards. You can review topics like health and safety policy and insurance and safety for reassurance about how those matters are handled. That sort of detail matters more than people think, especially if cleaners are working around delicate surfaces or fixed appliances.
If sustainability is important to you, it is also fair to ask how waste, packaging, and product use are managed. Some households prefer cleaning plans that align with recycling and sustainability values, particularly when they are looking for a longer-term maintenance relationship rather than a one-off blitz.
Options, Methods, or Comparison Table
Different kitchens need different approaches. A quick comparison helps you choose the right method without overpaying or under-cleaning.
| Method | Best for | Pros | Limitations |
|---|---|---|---|
| DIY deep clean | Light to moderate build-up, routine refresh | Flexible, budget-friendly, you control the pace | Time-consuming, easy to miss hidden grime |
| One-off professional clean | Single reset before an event, move, or seasonal refresh | Efficient, thorough, less stress | May not cover every specialist task unless agreed in advance |
| Targeted appliance cleaning | Ovens, hobs, extractor units, stubborn grease | Strong results in problem areas | Does not address cupboards, floors, or general room dust |
| Ongoing domestic support | Busy homes that want less maintenance pressure | Consistent standard, easier upkeep | Not always the best choice for a badly neglected kitchen |
In practice, many people use a mix: DIY maintenance, a focused appliance clean when needed, and a periodic deeper reset. That is usually the most realistic option for a busy Barnes Village household. No drama, just a sensible system.
Case Study or Real-World Example
A fairly typical Barnes Village scenario goes like this. A family has been living with a kitchen that looks fine at a glance, but by Friday evening the hob feels sticky, the extractor has a faint cooking smell, and the cupboard handles are dull with fingerprints. Nothing catastrophic. Just enough to be annoying.
They start with a full clear of the counters, then work from the top shelves down to the floor. The biggest difference comes from three places: the extractor filters, the oven door glass, and the sink area around the taps. Once those are properly cleaned, the room suddenly looks brighter, even before the floor is finished. A few minutes later, with the floor washed and the handles polished dry, the kitchen feels calm again. Not showroom-perfect, just genuinely clean. Which is, frankly, what most people actually want.
What made the biggest difference was not scrubbing harder. It was sequence, patience, and not missing the details. That is the whole point of a proper checklist.
Practical Checklist
Use this kitchen deep clean checklist as your working guide. If you print it out or keep it on your phone, even better.
- Clear counters and remove loose items.
- Dust high shelves, cabinet tops, and light fittings.
- Vacuum crumbs from corners, skirting, and behind movable items.
- Degrease the hob, extractor, splashback, and surrounding areas.
- Clean extractor filters where accessible and safe to do so.
- Wipe oven exterior, microwave exterior, and appliance fronts.
- Clean inside cupboards and drawer faces.
- Wipe handles, switches, taps, and other high-touch points.
- Descale the sink, taps, and drainer if needed.
- Wash the worktops using the correct method for the material.
- Clean the fridge exterior, seals, and handles.
- Empty and wipe the bin area.
- Finish with the floor only after everything else is dry or contained.
- Buff shiny surfaces so they do not streak.
- Step back and check corners, edges, and under appliances.
If you want a broader home refresh rather than just the kitchen, you might combine this with house cleaning or a more general one-off cleaning visit. That way the job feels finished, not half-finished.
Get a free quote today and see how much you can save.
Conclusion
A Barnes Village kitchen deep clean checklist is really about control. It gives you a clear order, helps you avoid wasted effort, and makes the room feel genuinely fresher rather than just briefly tidy. The best results come from moving methodically, cleaning the hidden spots, and giving the greasy areas the attention they deserve.
Whether you do it yourself or bring in help for the heavier jobs, a kitchen reset is one of those tasks that pays you back every single day. The room smells better, looks brighter, and feels easier to live with. And that is no small thing in a busy home.
Take it one section at a time, do the details properly, and you will feel the difference the moment you walk in.
Frequently Asked Questions
What should be included in a Barnes Village kitchen deep clean checklist?
It should cover counters, cupboards, the hob, oven, extractor, sink, taps, handles, splashbacks, appliances, and the floor. The main idea is to clean from top to bottom so dirt does not fall onto finished areas.
How often should a kitchen be deep cleaned?
That depends on how heavily the kitchen is used. Many homes benefit from a proper deep clean every few months, with lighter upkeep in between. Busy family kitchens may need it more often.
Is a deep clean the same as a regular kitchen clean?
No. A regular clean keeps visible surfaces tidy, while a deep clean reaches the buildup that hides on cupboard edges, extractor filters, appliance fronts, and other overlooked areas.
Can I deep clean my oven as part of the kitchen checklist?
Yes, but ovens often need more time and care than the rest of the room. If there is heavy baked-on residue, a dedicated oven service or specialist approach can be much more effective.
What is the hardest part of a kitchen deep clean?
Usually the greasy areas: the hob, extractor, oven door, and the space around handles and seals. Those spots often need more patience than brute force.
What cleaning products are safest for kitchen surfaces?
That depends on the surface. Mild detergents, suitable degreasers, and non-scratch cloths are usually the safest starting point. Always check manufacturer guidance for worktops, appliances, and finishes.
Should I empty cupboards before deep cleaning them?
Yes, if you want a proper result. You can wipe the outside of cupboard doors without emptying them, but interior cleaning is much easier when items are removed first.
How long does a full kitchen deep clean usually take?
It varies a lot depending on size, condition, and whether appliances are included. A lightly used kitchen may take a couple of hours, while a neglected one can take much longer.
Do I need professional help for a kitchen deep clean?
Not always. If the kitchen is moderately maintained, a careful DIY clean may be enough. If grease, scale, or appliance grime is heavy, professional support can save time and give a better finish.
What should I clean first in the kitchen?
Start with clutter removal and dust at the highest points, then work down through cupboards, appliances, worktops, and finally the floor. That sequence keeps the job efficient and cleaner overall.
How can I keep a deep-cleaned kitchen looking good for longer?
Wipe spills quickly, clean the hob after use, dry taps and sinks, empty the bin regularly, and give high-touch areas a light wipe each day. Small habits make the biggest difference.
What if my kitchen has dust from recent building work?
Post-renovation dust behaves differently from ordinary kitchen grime, so it may need a more specialised approach. In those cases, after-builders cleaning is often the better fit than a standard surface clean.
For a cleaner, calmer kitchen, the main thing is simple: work methodically, do not miss the details, and give the room the reset it has been asking for. There is something quietly satisfying about it, really.